

Maintaining the integrity of your roof is crucial for protecting your home from the elements. Over time, shingles can suffer damage such as curling, cracking, or even going missing, leading to potential leaks and structural issues. So, how can you repair shingles on your roof effectively? This guide will walk you through the process and introduce you to how Proper Roofing Ltd can assist Vancouver residents with their roofing needs.
How to Repair Shingles on Your Roof?
Repairing shingles on your roof is a straightforward process that can protect your home from leaks and weather damage. Start by identifying damaged shingles, such as those that are cracked, curled, or missing. Use a pry bar to carefully remove the damaged shingle, ensuring you don’t disturb surrounding ones. Replace it with a new shingle, aligning it properly and securing it with roofing nails. Seal the edges and nail heads with roofing cement to create a watertight seal. If you’re uncertain about tackling the repair yourself, a professional roofing company can provide expert roofing services to ensure your roof remains in top condition.
Identifying Roof Shingle Damage
Regular inspections are essential for ensuring your roof remains in good condition and protecting your home from weather-related damage. Identifying signs of roof shingle damage early can prevent small issues from becoming costly repairs. Below are common types of shingle damage and their causes:
Curling at the Edges
Curling shingles occur when the edges begin to lift and separate from the roof’s surface. This can happen due to aging, prolonged exposure to moisture, or poor installation techniques. Curling reduces the shingles’ ability to shed water, increasing the risk of leaks and further damage.
Cracking or Splitting
Cracks in shingles often result from thermal expansion and contraction, a natural process as temperatures fluctuate. Over time, weather exposure can weaken shingles, making them brittle and prone to splitting. Cracked shingles compromise the roof’s ability to shield the underlying structure.
Blistering
Blistering is characterized by raised, bubble-like formations on the surface of shingles. This is usually caused by trapped moisture within the shingle or prolonged exposure to excessive heat. Left unaddressed, blistering can lead to material degradation and water penetration.
Missing Granules
The protective granules on shingles serve as a barrier against harmful UV rays. When these granules are worn or missing, the shingles become vulnerable to sun damage, accelerating their deterioration. You might notice granule loss in your gutters or downspouts during cleaning.
Wind Damage
High winds can lift shingles from the roof deck, breaking the seal between shingles and exposing your roof to rain and debris. In extreme cases, shingles can be torn off completely, leaving the roof vulnerable to leaks and structural issues.
Moss and Algae Growth
Moisture-rich environments, such as those in shaded or humid areas, can lead to moss and algae growth on shingles. This not only affects the aesthetic of your roof but also traps moisture, potentially causing rot and weakening the shingles over time.
Tools and Materials Needed
To effectively repair roof shingles, you’ll need the following tools and materials:
- Replacement Shingles: Always keep extra shingles that match your current roof for a seamless repair.
- Flat Pry Bar: Used for carefully lifting shingles and removing nails.
- Hammer: Necessary for driving in roofing nails during installation.
- Roofing Nails: Choose corrosion-resistant nails to ensure durability.
- Roofing Sealant or Cement: Helps to secure shingles and seal cracks or gaps.
- Caulking Gun: Facilitates precise application of roofing sealant.
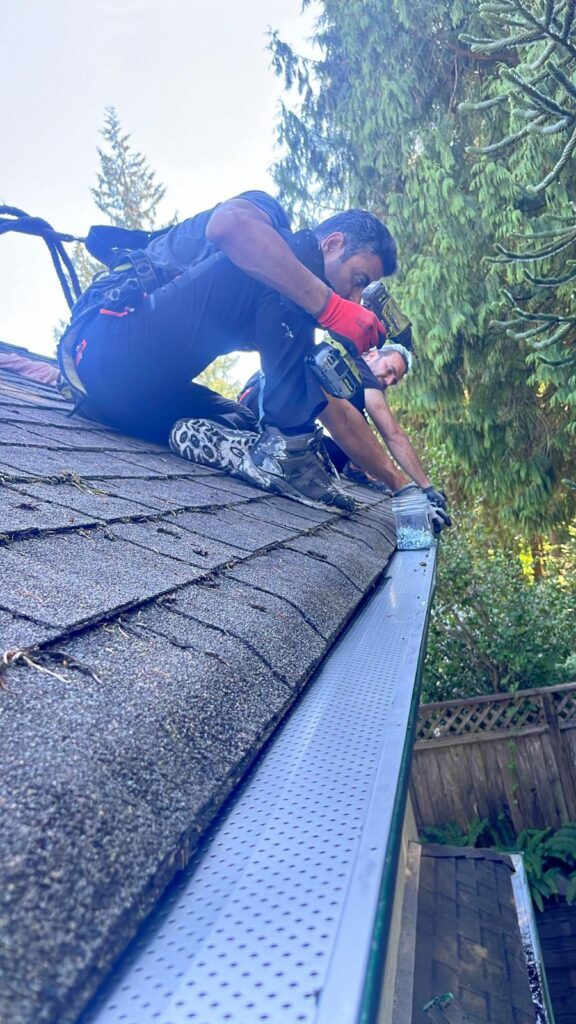
- Safety Equipment: Includes a sturdy ladder, safety harness, and gloves to ensure safe working conditions.
Steps to Repair Damaged Shingles
Step 1: Remove Damaged Shingles
- Gently lift the edges of surrounding shingles with a flat pry bar. Be careful not to damage adjacent shingles.
- Use the pry bar to remove the nails securing the damaged shingle.
- Slide out the damaged shingle. If it’s stuck, avoid forcefully pulling to prevent tearing.
Step 2: Install Replacement Shingles
- Slide the replacement shingle into position, ensuring proper alignment with surrounding shingles.
- Secure the shingle with roofing nails under the upper shingle to keep them covered and watertight.
- Apply roofing sealant over the nail heads and along overlapping edges to create a tight seal.
Step 3: Address Minor Repairs
- For Curled Shingles:
Apply roofing sealant beneath the curling section, press it down firmly, and use a heavy object to hold it in place until the adhesive sets. - For Cracked Shingles:
Apply sealant beneath the crack, press the shingle down, and spread a thin layer of sealant over the crack. Smooth the sealant with a putty knife for a clean finish.
Can Roof Shingles Be Resealed?
Yes, roof shingles can often be resealed if they are not severely damaged. Roofing sealant is highly effective for re-adhering curled or loose shingles, prolonging their lifespan and delaying the need for a full replacement. Regular inspections can help identify shingles that need resealing before they become a larger problem.
What Is the Best Adhesive for Roof Shingles?
Roofing sealant or roofing cement is the most recommended adhesive for securing shingles. These products are designed to withstand harsh weather conditions and provide a strong bond between shingles and the roof deck. Always choose an adhesive compatible with asphalt shingles for the best results.
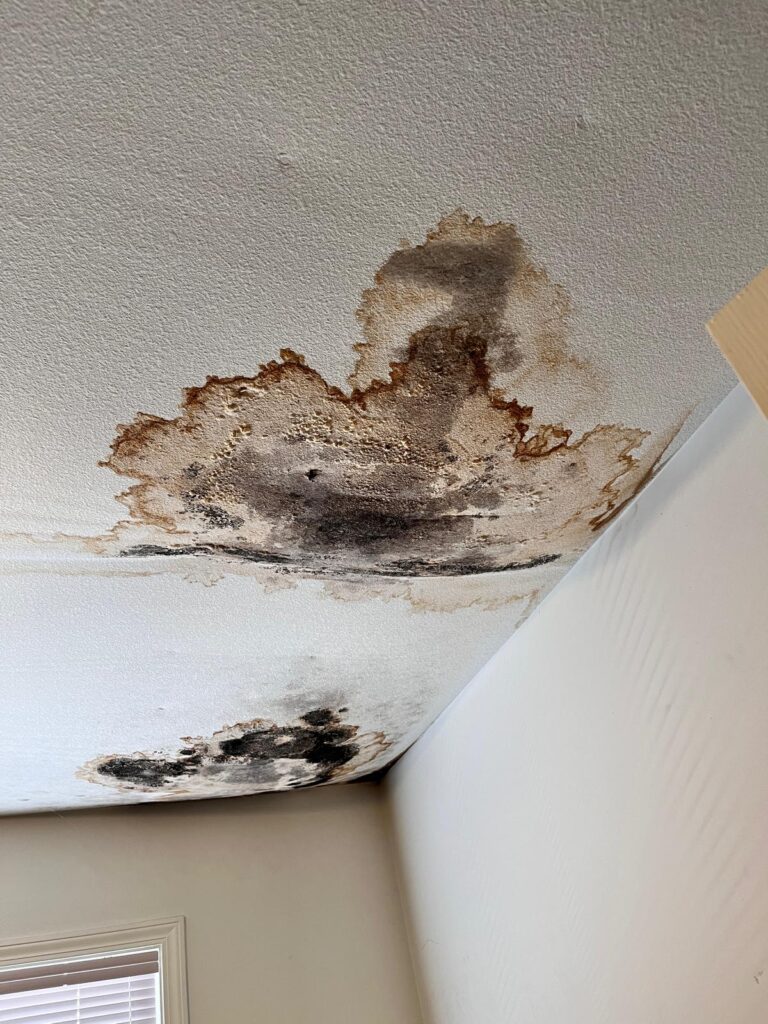
How to Repair Leaking Roof Shingles
- Identify the source of the leak by inspecting the roof for damaged or missing shingles, cracks, or holes.
- Follow the steps outlined above to replace or repair the affected shingles.
- Ensure all repaired areas are thoroughly sealed with roofing sealant to prevent water infiltration.
- Check flashing, vents, and other roof components for additional issues that may contribute to leaks.
- Test the repaired area by simulating rainfall or observing during the next rain to confirm the leak is resolved.
By addressing shingle damage promptly, you can maintain the durability and functionality of your roof while avoiding costly repairs.
Proper Roofing Ltd: Your Vancouver Roofing Experts
At Proper Roofing Ltd, we understand the challenges Vancouver homeowners face with roof maintenance and repairs. Our comprehensive services include:
- Roof Maintenance: Addressing leaks, damaged shingles, flashing damage, and roof moss to prolong your roof’s lifespan.
- Roof Installations: Expert installation of downspouts, ridge caps, and various roofing materials to ensure durability and aesthetic appeal.
- Roof Inspections: Thorough assessments to identify leaks, cracks, damaged shingles, and ventilation issues, providing you with a clear understanding of your roof’s condition.
- Roof Repairs: Prompt and efficient repairs, including leak repair, flashing repair, patching, and vent repair, to safeguard your home against the elements.
Our Vancouver Roofing team is dedicated to delivering high-quality workmanship and exceptional customer service to Vancouver residents.
Conclusion
Regular maintenance and prompt repairs of your roof shingles can extend the lifespan of your roof and protect your home from weather-related damage.
Don’t wait for minor roof issues to become major problems. Contact Proper Roofing Ltd today to schedule a comprehensive roof inspection and ensure your home remains protected year-round. Our experienced professionals are ready to provide tailored solutions to meet your specific roofing needs. Visit our website to learn more about our services and read testimonials from satisfied Vancouver homeowners. Trust Proper Roofing Ltd to keep your roof in optimal condition.
Check out our social media pages below:
Here are other related articles about roofing for you:
