
How Do You Replace Vinyl Soffit Panels? A Simple DIY Guide
So you’ve got a few sagging or cracked vinyl soffit panels, and now you’re wondering, “How to replace vinyl soffit panels?” Don’t worry—you’re not alone. Whether you’re dealing with storm damage, age, or just the wrath of a few overzealous squirrels, vinyl soffits are one of those things most homeowners ignore—until they can’t.
The good news? You can replace them yourself, and no, you don’t need to be a professional contractor to get the job done right. With the right tools, a bit of patience, and this guide, you’ll not only learn how to replace vinyl soffit panels step by step—but you’ll also discover tips and facts that most websites don’t even mention.
Plus, if you’re in Vancouver and realize this might be more of a “hire a pro” kind of job, we’ll introduce you to Proper Roofing, your go-to team for reliable roof replacement and soffit work.
What Are Vinyl Soffit Panels, Anyway?
Soffits are the flat or sloped surfaces tucked beneath your roof’s overhangs. They’re part of your home’s roofing system, and they serve a surprisingly important role. Vinyl soffit panels:
- Help ventilate your attic
- Prevent moisture buildup
- Keep pests out
- Contribute to your home’s curb appeal
Vinyl, specifically, is a top choice for soffits because it’s cost-effective, easy to maintain, and resistant to rot and insects. According to the Vinyl Siding Institute, more than 70% of new homes in North America incorporate vinyl for exterior applications because of its long-lasting durability and affordability.
Why Should You Replace Your Soffits?
You might think of soffits as cosmetic, but they’re actually a critical part of your roof system. When they go bad, problems can sneak in—quietly and quickly.
Here are a few signs it’s time to replace them:
- Panels are sagging or falling down
- Cracks or holes in the vinyl
- Water stains or visible mold
- Evidence of pests (bird nests, wasp hives, rodent droppings)
- Increased humidity or musty odors in the attic
A properly working soffit helps maintain optimal attic temperature. In fact, according to the U.S. Department of Energy, well-ventilated soffits can help reduce attic temperatures by up to 20°F in the summer, which in turn reduces your cooling bills and improves roof longevity.
Tools & Materials You’ll Need
Here’s your starter pack for a successful DIY vinyl soffit panel replacement:
- Ladder with stabilizers
- Safety goggles & work gloves
- Cordless drill or screwdriver
- Pry bar or flat bar
- Tin snips or a heavy-duty utility knife
- Replacement vinyl soffit panels
- Measuring tape
- J-channel or F-channel (optional, if replacing)
- Flashlight or headlamp
- Caulking gun and sealant (optional for added protection)
Bonus tip: Wear a long-sleeve shirt. You’ll thank yourself later when bits of insulation or insect debris come falling down while you’re working.
Step-by-Step: How to Replace Vinyl Soffit Panels
1. Inspect & Diagnose the Problem
Start with a solid inspection. Take a flashlight and peer behind the soffits. Look for signs of rot, mold, or pest activity. This might sound obvious, but a lot of homeowners skip this step and end up replacing panels only to deal with the same issues again.
If you notice water damage, check the gutter system. Are the gutters clogged or leaking? This could be the real cause behind the soffit failure.
2. Carefully Remove Damaged Panels
Start by gently prying the panel from its groove using a flat bar or your hands. Most vinyl soffits are interlocked and slide into a channel on both ends. Unlock the damaged panel and slide it out slowly to avoid cracking adjacent pieces.
Pro tip: If the panel resists, cut it into sections with tin snips—it’s easier than muscling it out and risking more damage.
3. Inspect the Soffit Cavity and Structure
After removal, check the underlying structure. Is the sub-fascia or rafter tail rotted? This is a good time to fix any foundational problems. If the wood is soft, crumbling, or discolored, it needs to be replaced.
Also, look for old wasp nests or bird droppings—common signs of soffit penetration. Installing a mesh screen behind the new panels is a rarely mentioned trick that can help prevent future pest problems.
4. Measure and Cut New Panels
Vinyl soffit panels typically come in 12-foot lengths and should be cut to fit the cavity between the channels. Use a measuring tape to get the exact length and subtract about 1/8″ to allow for thermal expansion.
Use tin snips or a utility knife to make your cuts. Make sure the cuts are clean and even to avoid gaps that could let moisture or bugs in.
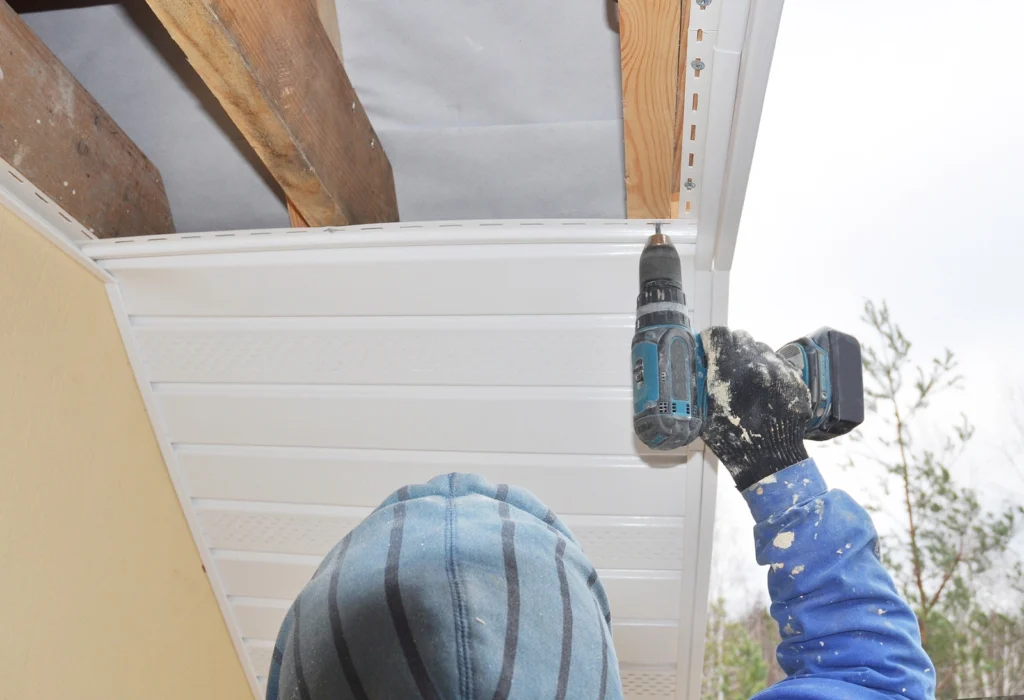
5. Install the Replacement Panels
Now for the satisfying part: installation.
- Slide one side of the panel into the J-channel or F-channel
- Push the other end up and snap it into the groove
- Continue this down the length of the soffit
- If necessary, use stainless steel screws to secure it (especially in high-wind areas)
Leave a small gap (around 1/32″) at each end of the panel for expansion. This is a crucial but often overlooked detail that prevents future warping.
6. Recheck Ventilation
Once installed, ensure the new panels are vented (unless you’re using solid ones for aesthetic areas like gables). A well-ventilated soffit helps regulate attic temperature and moisture.
According to Energy Star, you should aim for 1 square foot of vent space per 150 square feet of attic space—divided equally between soffits and roof vents.
Bonus Tips Most Websites Don’t Tell You

We promised you the good stuff, so here it is:
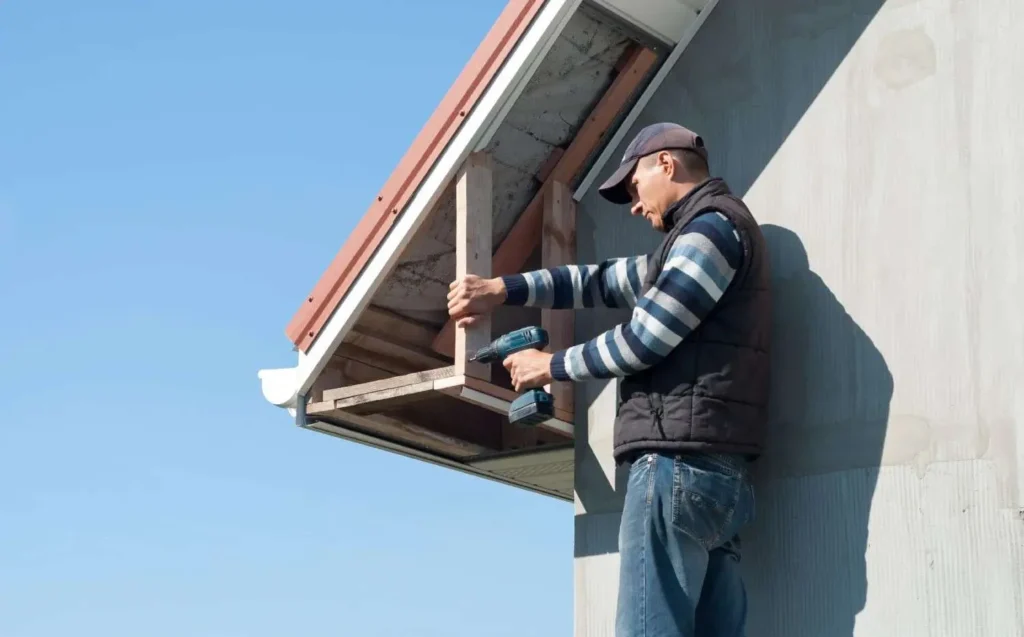
Pay Attention to Roof Eaves
Your soffits can only work well if your eaves are in good shape. If your roof has improper flashing or drooping eaves, water might be sneaking in behind the soffits and rotting the boards. If you spot this, a roofing professional should take a look.
That’s where Proper Roofing comes in. Homeowners in Vancouver trust them for their expert eye and top-notch Roof Replacement Vancouver services. They’ll inspect the whole system—not just swap panels and call it a day.
Don’t Forget the Insulation
You might find gaps in attic insulation near the eaves. This is a great time to seal them up using baffles or insulation guards to improve energy efficiency without blocking ventilation.
Soffit Panels Can Hide Wildlife Entry Points
Think of soffits like the front door for animals looking to crash at your place. Birds, bats, and squirrels all love loose soffit panels. If you’ve ever had an unexpected guest in your attic, adding mesh screening behind your panels is a game-changer.
When to Call in the Pros
If your entire soffit system is sagging, discolored, or infested—or if the issue is tied to roofing problems—it’s best to call in the professionals.
Not only will a roofing expert like Proper Roofing replace the panels properly, but they’ll also check for structural issues, moisture concerns, and attic ventilation that could lead to more damage down the line.
And if you’re in the Vancouver area, Proper Roofing offers full roof replacement services and inspections, ensuring your entire roof system—from shingles to soffits—is safe, secure, and energy-efficient.
Key Takeaways
- Vinyl soffits are vital to attic ventilation and pest prevention.
- You can replace damaged soffit panels with basic tools and a free afternoon.
- Always inspect for hidden issues like mold, rot, and pests before installation.
- Ventilation is key—don’t skimp on airflow or insulation.
- If things look more serious, Proper Roofing in Vancouver has your back.
Final Thoughts
Tired of staring at sagging soffits or dealing with surprise animal tenants in your attic? It might be time to give your home a little TLC. Replacing vinyl soffit panels is a great DIY project, but if you’re seeing signs of bigger trouble—like moisture, mold, or widespread damage—it’s best to leave it to the pros.
At Proper Roofing, we offer expert roof replacement in Vancouver, including full soffit inspections and repairs. Our team takes a whole-home approach to roofing, ensuring every detail—from ventilation to curb appeal—is covered.
Don’t wait until damage spreads—contact Proper Roofing today for a free consultation.
Let’s get your home looking sharp and functioning like it should.
Because a strong roof starts with solid details—and that includes your soffits.
Check out our social media pages below:
Check out some of our blogs to help with your Roofing needs:
How to Repair a Sagging Gutter